Showing posts with label cosplay. Show all posts

Saturday, April 16, 2011

New Costume!

Italy is that doofus in the middle.
I decided at the last minute to swap out one of my costumes this year. I was originally going to go as Horo, from Spice and Wolf, but now I'm going as Italy from Hetalia!
I'm holding my other costumes close to the vest at the moment, as one of them I'm entering in the costume contest and the other... well, its done and I don't have any pictures. so there.

Helpful Creatures

In the course of any project, I have creatures that want to help. Normally, they are my cats; small and easily removed.

Cat helps with laundry!
Cat helps with ironing!
However, I have been recently plagued with a new round of less.. removable obstacles.

Helpful dogs.

Saturday, April 9, 2011

I've returned!

Its been over two weeks since I last posted and man, I finished a lot of stuff while I've been away. (Literally actually, I went to visit a friend for extended sewing-times.) I didn't finish nearly enough though, and with less than two weeks until the convention beigns I've decided to launch...

The Daily Cosplay Countdown!
(Watch my slow descent into madness!)

Every day I'll post what I did the day before, as well as some catch-up posts to show what I've done during these weeks I've been away.

Friday, March 4, 2011

Cosplay Basics: Boots

One item that is necessary at some point for most any cosplayer is a good pair of boots. There are boots in all sorts of costumes: ankle boots, knee-high boots, calf-high boots, brown boots, rain boots, thigh high, armored, the list goes on and on.
from thumbuki on Flickr.
Fortunately, there are plenty of boot-cover tutorials out there to help you modify your shoes, and a lot or them are even completely removable so you can use the same base shoe for multiple cosplays.

But if you're only going to get one pair of boots, there are some things to look for the get the most bang for your buck.

  1. Black or dark brown: these are the most common colors.
  2. Rounded toe: also a common design, and you can even wear them under your pants instead of a dress shoe or sneaker.
  3. Mid-calf: this style is used extensively in military-style uniforms, and you can make a boot taller with a cover.
  4. Simple Details: its easier to modify a boot without laces or buckles, but sometimes you want to add some interesting details to your costume. Your mileage may vary, so go smaller rather than larger.
  5. Think about a small heel, definitely a chunky one so that the silhouette of the shoe can go masculine or feminine.

These ones look pretty good, except for the suede. These gogo boots are perfect for a lot of cosplays, and can even be stripped of their varnish and painted. They're also fairly cheap, although the sizing isn't great. These ones look great; I'd even wear those outside of cosplay. (Speaking of which, endless.com is a great resource not only to buy your shoes, but just to look around at what is available at the time.) Doc Martens are a classic for a reason, but tend to be too expensive for my tastes.

Take a look around, and find something that works for you!

Tuesday, March 1, 2011

3/01/2011 Progress Report


I got a lot of stuff done this past weekend, even though I spent a good deal of Saturday and Sunday laid up like this:

I', starting to develop some RSI in my wrist from computer work and knitting. This particular flare-up was brought to you courtesy of knitting for six hours on Tuesday. =(

Anyway, I took the opportunity this presented to use my sewing machine instead, sewing up 75% of the Thief costume I'm working on and getting started on the embroidery that I want to add to it.


Blanket stitch courtesy of Stitch School, done in variegated yellow DMC floss.
Since I've had some problems in the past with ironed-on applique, I decided to stitch down all of the applique on this particular project. I like the look so much that I'm looking for other places to add it, especially for my Adell project. Large stitches like this just make it look kinda rustic, like it comes from the countryside that the game takes place in.

I also started receiving the packages that I ordered last week. I'm done to some last-minutes items and the wigs to order and then I'll have all of my supplies!

Enormous Shoes


Wednesday, February 23, 2011

2/22/2011 Progress Report

Last week I was quite productive, although not nearly enough in the cosplay department.

I started some up-cycling projects

Finished and in-progress t-shirt yarn

Tuesday, February 22, 2011

Cosplay How To - Coloring Eyebrows

I picked up this technique a while ago on the cosplay.com forums and I still refer some of my dark-haired friends to it. However, I've never actually done it myself! So I'm putting my money where my mouth is and my prop-making supplies all over my face.

So this technique is especially helpful for people with dark hair that want to go lighter without bleaching their eyebrows. Its also just generally helpful for all hair colors if you want something that is long-lasting and cheap.


So first you'll want to gather your supplies. I used:
  • Washable school glue.
  • Acrylic paint
  • A small paintbrush. ( I chose a stiff, flat brush. I think an angled brush would work even better.)
  • A wig, and other necessary stuff for putting it on my head. (I mean, the whole point is for my eyebrows to match my wig!)

Sunday, February 13, 2011

Wig Color Reference - Light Blondes

I made this up for a friend of mine: hopefully it can be useful for someone else!

#24B, LG26, #613, #22, #24, #16 from the New Look line of wigs.

There are many, many, many different wig colors available. How do you choose the right one?

Well, it really helps to have a swatch ring, because you can line them up under all sorts of light and choose the one you like the best! My favorite for a lot of costumes is #24B, because its a bright blond that looks close to a yellow color but slightly more natural.

What's you preferred wig color?

Thursday, February 10, 2011

Striped Thigh Highs Step-by-Step

I'm doing a costume for a friend of mine so she can join our Disgaea 2 group.

Its a super cute costume, and I'm excited about lots of different parts about it. But, you see those thigh-highs? There's nothing like them on the market. So, I'll be using RIT's spot-dying technique to put those gold stripes on them.

Tuesday, February 8, 2011

Progress Report 2/7/2011

I got these done this weekend!


They're not for me, but I am pretty excited nonetheless! Look for more in a day or two!

Friday, February 4, 2011

How-To : Natuski's Bunny Ears


To start, I used a paper pattern to cut out two pieces each of the pink flannel and the black velvet. After some experimentation with a couple different types of wire and threading systems, I realized I had some styrene plastic in the back of the closet, so I cut another piece in that shape.

I sewed the fabric together, right sides together, turned them right-side out and then stuffed them with the stiff plastic.


The pieces still looked a little sloppy, so I pressed them with an iron. Because the plastic is thin, it became a little malleable when heated so I was able to shape the ears into a lovely curved shape.
 Then I glued the bottom of the fabric closed and then attached them to the headband.
 And here's the finished product!
 The ears are just glued carefully to the headband, so they've still got a little movement in them when I move my head. I haven't completely decided if I like it but I don't think I can make it any better.
 

Tuesday, February 1, 2011

Progress Report - 2/01/2011

11 weeks to go, four costumes (+1 secret costume) to make, and what did I get done last weekend?

Eh, not much. At least I finished up Horo's anklets! They're made of memory wire and glass blue beads.

And there's not much I'm going to get done this weekend: my sewing station has been packed up to make room for visiting relatives. However, I do have some plans involving a friend's costume that I need to get done, so hopefully I'll have something more interesting to report.

Here's a sneak peek at something that should see completion in the coming months:

Friday, January 28, 2011

Cosplay Basics : White Button-up Shirt

Photo by Stuart Conner
There are some skills and pieces that get used in cosplay over and over again. This segment highlights what some of these are and, in some cases shows you how to do them.


This week's cosplay basic is... the white button-up shirt!

This shirt can be used in hundreds of different cosplays, if only because of the proliferation of suited-up characters and the myriad animes that take place in schools with uniforms. I myself have used a white button-down in:

  • Death the Kid (Soul Eater)
  • Minori (Toradora!)
  • Jack (Harvest Moon)
  • Shinigami (Kyouran Kazoku Nikki)
  • My steampunk costume
That is a lot of bang for you buck out of one purchase. So, what are some things you should think about when purchasing a white shirt for cosplay?

  1. Go for shirt that is long-sleeved and buttons all the way up. This is the typical form that's shown in most costumes, so you'll get more milage out of it. Its easy to unbutton a shirt, its way more difficult to try and pin a shirt together. I speak from experience.
  2. Go look at thrift stores! The big format stores like Goodwill and Value Village may have exactly what you need. Don't be afraid to make alterations like removing a pocket or some detailing. Also, if it looks dingy, just toss it in the wash, it will often lighten up. If it doesn't, try some whitening agents. I'm a big fan of RIT's White-Wash but bleach will work just as well.
  3. Get one that fits: not too big, not too small. Check to see if it fits across the shoulders so that it will lay nicely, and make sure you aren't straining any buttons across the chest. 
That's all the advice I have for picking out a white button-up. Does anyone else have any thoughts? what are some basics in your closet?

    Tuesday, January 18, 2011

    Monday Progress Report : 01/18/2011

    I hoped that with this feature I'd be able to chronicle my progress throughout the quarter and have a reason to finish pieces of my projects over each weekend.

    Unfortunately, this week is not only a day late (well, it was a three-day weekend) but I also don't have that much to report!

    I'm hoping to get my Natsuki costume done in time to wear it to the movie's opening weekend down in Seattle in two weeks, but I didn't make much headway. What I did do was... this!


    Her funny little bunny ears! I'll post some in-progress pictures later this week.

    I also went out and bought the last piece of fabric, and when I was getting ready to start on the gi (the top) I realized I hadn't pre-washed any of the fabric, so.. that's what I did instead of actually sewing.

    I also started some projects to take to Video Games Live this weekend.

    I've still got more in the works, I'll have to show you later!

    Tuesday, January 11, 2011

    SakuraCon 2011 Cosplay Rundown

    The one major con I attend every year is Sakura-Con, in Seattle, Washington. I always do at least three costumes, since its my one guaranteed chance to dress up for an entire weekend with like-minded fans.

    I usually spend the summer and fall planning my costumes and making many of my materials purchases. This means that January through March is one long marathon of costume making, which will hopefully not culminate in a frantic two straight weeks of sewing right up until the deadline.

    As such, every Monday I'll be posting a progress report on what I've accomplished the previous weekend! This will keep me on track and give you a preview of what I'll be wearing come April.

    This year, I'll be doing Natsuki, from Summer Wars:
    The girl with the bunny ears.
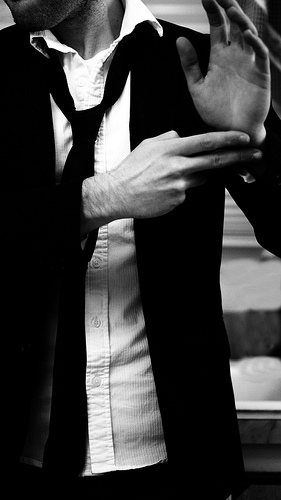
    As well as a Disgaea group. I'll be doing Adell:

    I need to do more push ups.
    And finally, one I've been wanting to do for a while:

    Horo, from Spice and Wolf, the only anime that's ever taught me about economics.

    It's a long lineup, and I've got some extra projects lined up, and maybe even and extra, super-secret cosplay. I'm excited to get started!